Macro Photography: Fix Blurry Close-Ups (MFD Guide)
Advertisement
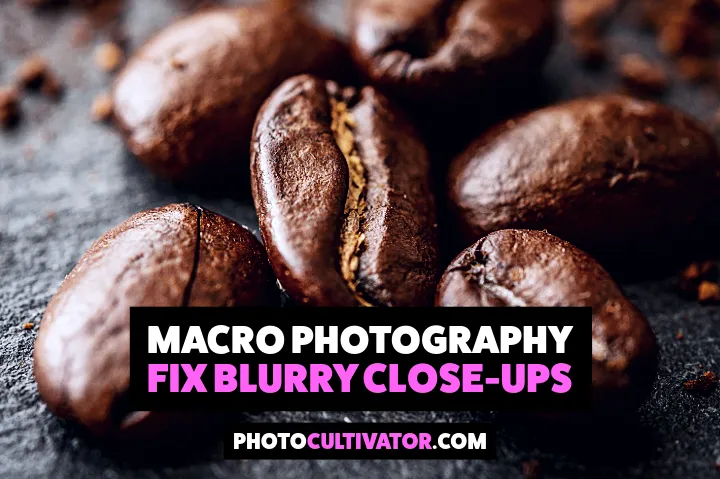
Macro is magic.
Petals become landscapes, textures turn into patterns. If your close-ups look soft while the background seems fine, it’s not you but physics.
A few simple tweaks fix most blur.
The Big Four Causes of Blur
Quick definitions: MFD (Minimum Focusing Distance) = the closest distance from your camera’s sensor plane to the subject where the lens can still focus; working distance = space from the front of the lens (or hood) to the subject.
- Too close Every lens has an MFD; go inside it, and the lens cannot focus. Period. Many telephoto zooms (e.g., 70–300mm) need about 0.9–1.5 m in normal mode.
- Motion blur At high magnification, tiny shakes look huge. Handheld + breeze = mush.
- Missed focus Depth of field is razor-thin; AF often grabs the wrong plane.
- Diffraction Stopping down to f/16–f/22 can soften fine detail.
60-Second Field Fix
- Back up until focus locks instantly; if it hunts, you’re too close.
- Aperture: start f/8–f/11 (sharp + usable depth).
- Shutter: aim for 1/(focal length) minimum; at 300mm, target 1/500s or faster.
- ISO: let it rise to hold that shutter: sharp + slightly noisy > clean + blurry.
- Focus: go manual, pre-set focus, then rock your body forward/back until it snaps, fire a short burst. If you want a quick refresher on exposure before you head out, read my simple primer in The Ultimate Photography Guide for Beginners 2025.
The “Macro” Switch, Decoded (on Many 70–300s)
That switch reduces MFD at the long end (often 180–300mm).
You get higher magnification, sometimes up to 1:2 (0.5×) on certain models, but it’s not true 1:1 macro. It’s great for larger flowers, textures, and bigger insects; you must still respect the reduced MFD (often ~0.95 m).
If AF won’t lock: back up.
Handheld “Just Works” Recipe
- Mode: A/Av (or Manual)
- Aperture: f/8–f/11
- Min Shutter (Auto ISO): 1/500s at the long end
- Drive: High-speed burst (3–5 frames)
- Focus: Manual + peaking (if available), or AF-C with a single small point
- Stabilization: Use IBIS/VR for camera shake (won’t stop subject movement)
- Body mechanics: Tuck elbows, exhale, rock to focus, shoot when it pops If you often shoot low to the ground, flip-out/tilt screens make life easier; I compare options in Tilt vs Articulating Camera Screens.
Tripod Precision (When You Want Zero Guesswork)
A sturdy tripod removes the handshake.
Add a focusing rail for millimeter nudges. Use live-view magnification to confirm the critical plane (insect eye, petal edge).
On DSLRs, use mirror lock-up / EFCS to reduce micro-vibrations.
For fine front-to-back nudges during stacking, a budget 4-Way Macro Focusing Rail makes alignment painless.
For ground-level work, a compact Manfrotto PIXI Tabletop Tripod is a sturdy throw-in-the-bag option.
Light That Helps Focus (and Freeze Motion)
- Bright, even light makes AF easier and keeps shutter speeds high.
- Flash + diffuser is a macro cheat code: it freezes motion and keeps ISO low. To tame breeze and keep stems steady, a flexible clamp like the Wimberley Plamp II is a quiet macro superpower.
- Block the wind with your body or jacket to calm the subject. For a compact lighting kit that works great for close-ups, see the flash and modifier picks in my Cocktail Photography Gear Guide. Also, a quick lens clean saves otherwise sharp shots. I share my go-to cleaning kit in Top 5 Photography Gadgets You Can’t Miss. My quick kit is a Giottos Rocket Air Blower and Zeiss Pre-Moistened Lens Wipes: two minutes that can save a shoot.
If you want flash that freezes motion up close, the two-light Godox MF12 macro kit is purpose-built.
For a versatile all-rounder that also works off-macro, the round-head Godox V1 pairs great with a small softbox.
Focus Stacking (For Full Front-to-Back Sharpness)
The depth of field is tiny up close. If you need it all sharp:
- Lock the camera (tripod).
- Shoot a series from front → back, nudging focus each frame (or use in-camera focus shift).
- Merge in Photoshop / Helicon Focus, etc. If focus stacking is new to you, my Astrophotography Cameras for Beginners guide walks through the stacking workflow step-by-step. The same concepts apply to macro subjects, too.
Choosing the Right Tool for More Magnification
1. Extension Tubes (no glass, closer focus)
- What they do Move the lens away from the sensor so it focuses closer (more magnification).
- Quality tip (important) Get tubes with electronic contacts. On modern lenses, cheap tubes without contacts kill aperture control (and often AF/metering). You can live without AF in macro, but you want aperture control and EXIF.
- Trade-offs Reduced working distance and light loss (expect slower shutter or higher ISO). No added glass means no new aberrations, but you lose infinity focus while they’re on.
If you want a no-fuss set that preserves aperture control and AF on modern lenses, the Kenko Auto Extension Tube Set DG is the reliable pick.
2. Close-Up Lenses / Diopters (screw-on “magnifiers”)
- What they do Add optical power to the front of your lens to focus closer while keeping all electronics working.
- Get achromatic diopters. Multi-element designs (e.g., Canon 250D/500D, Raynox DCR-150/250) reduce chromatic aberration and keep edges much sharper than cheap single-element filters that often cause color fringing and soft corners. Don’t know your filter size or want one diopter for multiple lenses? A simple K&F Concept Step-Up Ring Set lets a Raynox or achromat fit cleanly across your kit.
- Often more working distance than tubes at similar magnification, and quick to remove in the field.
- Budget guide (approx): Single-element close-up filters: ~$10–20 (soft edges, more CA)
- Raynox DCR-150/250 achromats: ~$50–150 depending on size/power
- Canon/Nikon branded achromats: ~$80–150
3) True Macro Lenses (the gold standard)
- 1:1 (life-size) reproduction with flat fields and excellent sharpness.
- 90–105mm is the sweet spot for a first macro: great balance of reach, size, and price.
- Working distance matters: At 1:1, a 105mm macro typically gives ~140–150 mm working distance; 200mm macro pushes to ~240 mm+.
- Why you care: More space for light, less chance of spooking insects, easier composition without shadowing the subject. For a quick feel for how macro lenses render tiny textures and what focal lengths to consider, skim my breakdown in The Best Lens for Jewelry Photography. If your macro work leans product-style, the lens notes in Top Used DSLR & Mirrorless Cameras for Product Photos show which focal lengths excel for small objects and table-top setups. And if you shoot close-up detail on skin, my best lens for tattoo photography picks share the same sharp-detail priorities.
Working Distance, Explained (and Why It’s a Big Deal)
- Working distance = front of lens (or hood) → subject at a given magnification.
- More distance = more control: Easier to place diffused light without bumping the subject
- Less disturbance for skittish insects
- Reduced risk of casting shadows or blocking ambient light
Quick Troubleshooter
- Subject soft, background sharp: You’re inside MFD or AF hit the wrong plane → back up and use a single focus point (or manual rock).
- Everything a bit soft: Motion blur → raise shutter / use flash / stabilize.
- Mushy at high f-numbers: Diffraction → open to f/8–f/11.
- Only a sliver sharp: Normal macro DOF → change angle, stop down slightly, or focus stack.
- Color fringing/soft edges with close-ups: Likely single-element diopter → switch to achromatic.
Field Checklist (Save This)
- Start f/8–f/11, 1/500s, Auto ISO
- Back up to clear MFD
- Manual focus + rock; shoot short bursts
- Stabilize (tripod or solid stance)
- Add light (flash + diffuser) when needed
- Need more depth? Focus stack
- Need more magnification? Tubes (with contacts) or achromatic diopter
- Shooting insects? Prefer longer working distance (150–200mm macro)
Final Thoughts
Macro rewards small, consistent habits.
Respect MFD, keep shutter speeds honest, and use manual-focus rocking with short bursts. Add either tubes (with contacts), an achromatic diopter (Raynox/Canon/Nikon tiers above), or a true macro lens as your needs grow.
Do that, and your “almost sharp” frames turn into crisp, detailed keepers!
🔗 Was this useful? Forward to a photographer friend, and save more wins in the Archive.
Hakan | Founder, PhotoCultivator.com